How to Download and Install VS Code on Windows
Visual Studio Code is a lightweight and versatile code editor developed by Microsoft. It provides a powerful and customizable environment for coding, debugging, and collaborating on various programming languages. Whether you're a beginner or an experienced developer, VS Code offers a wide range of features and extensions to enhance your coding experience. It is available for Windows, macOS and Linux. It comes with built-in support for JavaScript, TypeScript and Node.js and has a rich ecosystem of extensions for other languages and runtimes (such as C++, C#, Java, Python, PHP, Go, .NET).
To download and install Visual Studio Code on your Windows machine, follow the steps below:
1. Go to the Official Microsoft Visual Studio Code Website
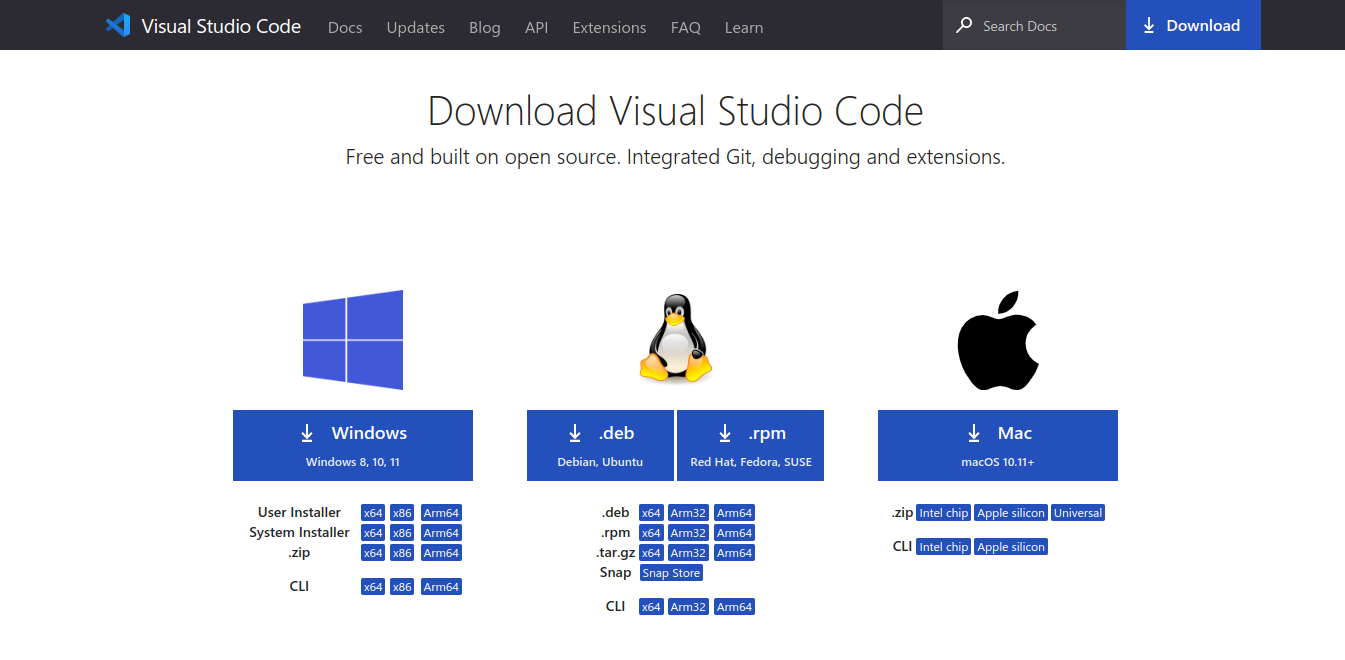
Log on to the Visual Studio Code Website , and click on the dropdown arrow beside the Download for Windows button. After this, you will be presented with different options. Click on the one best suited for your PC, and the download should begin automatically.
If you are unsure which version to download, we recommend that you check your PC specs to determine which would be a perfect fit for your system. After that, click on the version you want to download, and it will begin downloading automatically.
2. Run the Installer and Select Your Destination Folder
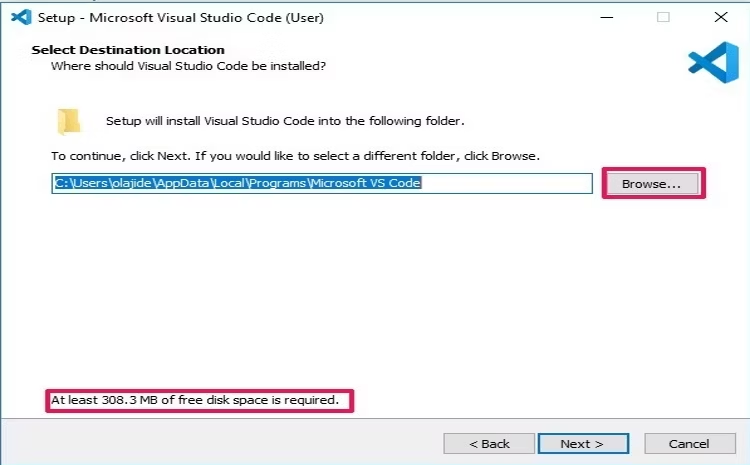
Once the download is completed, start up the installer. Accept the license by agreeing to the terms and conditions on your screen and click Next.
The Select Destination Location specifies where all the files relating to VS Code will be located on your computer. The default location is the Program Files folder on your PC's Local Disk. To change the location, click Browse and choose a new directory.
Note that Visual Studio Code has a minimum storage space requirement. As such, you must have enough storage space to install the application. If you do not have enough space, delete some applications or multimedia files and empty your recycle bin, then attempt to rerun the installer.
Repeat this task until enough storage is available to complete the installation, and then click Next.
3. Select the Start Menu Folder

This is to create a folder in the Start Menu containing a VS Code shortcut icon to enable you to access the application with just a click on the Windows button after the installation is completed.
You can change the shortcut's potential location by clicking Browse. Pick a location of your choice and click Next. If you decide not to make a shortcut for the application, tick the box labeled Don't Create a Start Menu Folder.
After making your selection, click Next to proceed to the next stage of the installation.
4. Selecting Additional Tasks

This tells the installer whether it should include extra functionality in the application.
We recommend that you tick the box labeled Create a Desktop Icon to create an icon on your home screen to ensure quick access to the application. However, leaving this box unselected won't affect the quality of your work or the app's overall functionality.
After ticking the other boxes according to your preference, click Next.
5. Complete the Installation
The tricky part is behind you. Just sit back, wait for the installation process to end, and click Finish. After this, launch the application, and your Microsoft Visual Studio Code should be ready to use.